Our data has safely reached the RPi via some network connection. Before we can save it onto a hard- or solid-state drive we have to think about how those drives will be connected to the Raspberry Pi.
This post is part of a series about building a Network-Attached Storage (NAS) with redundancy using a Raspberry Pi (RPi). See here for a list of all posts in this series.
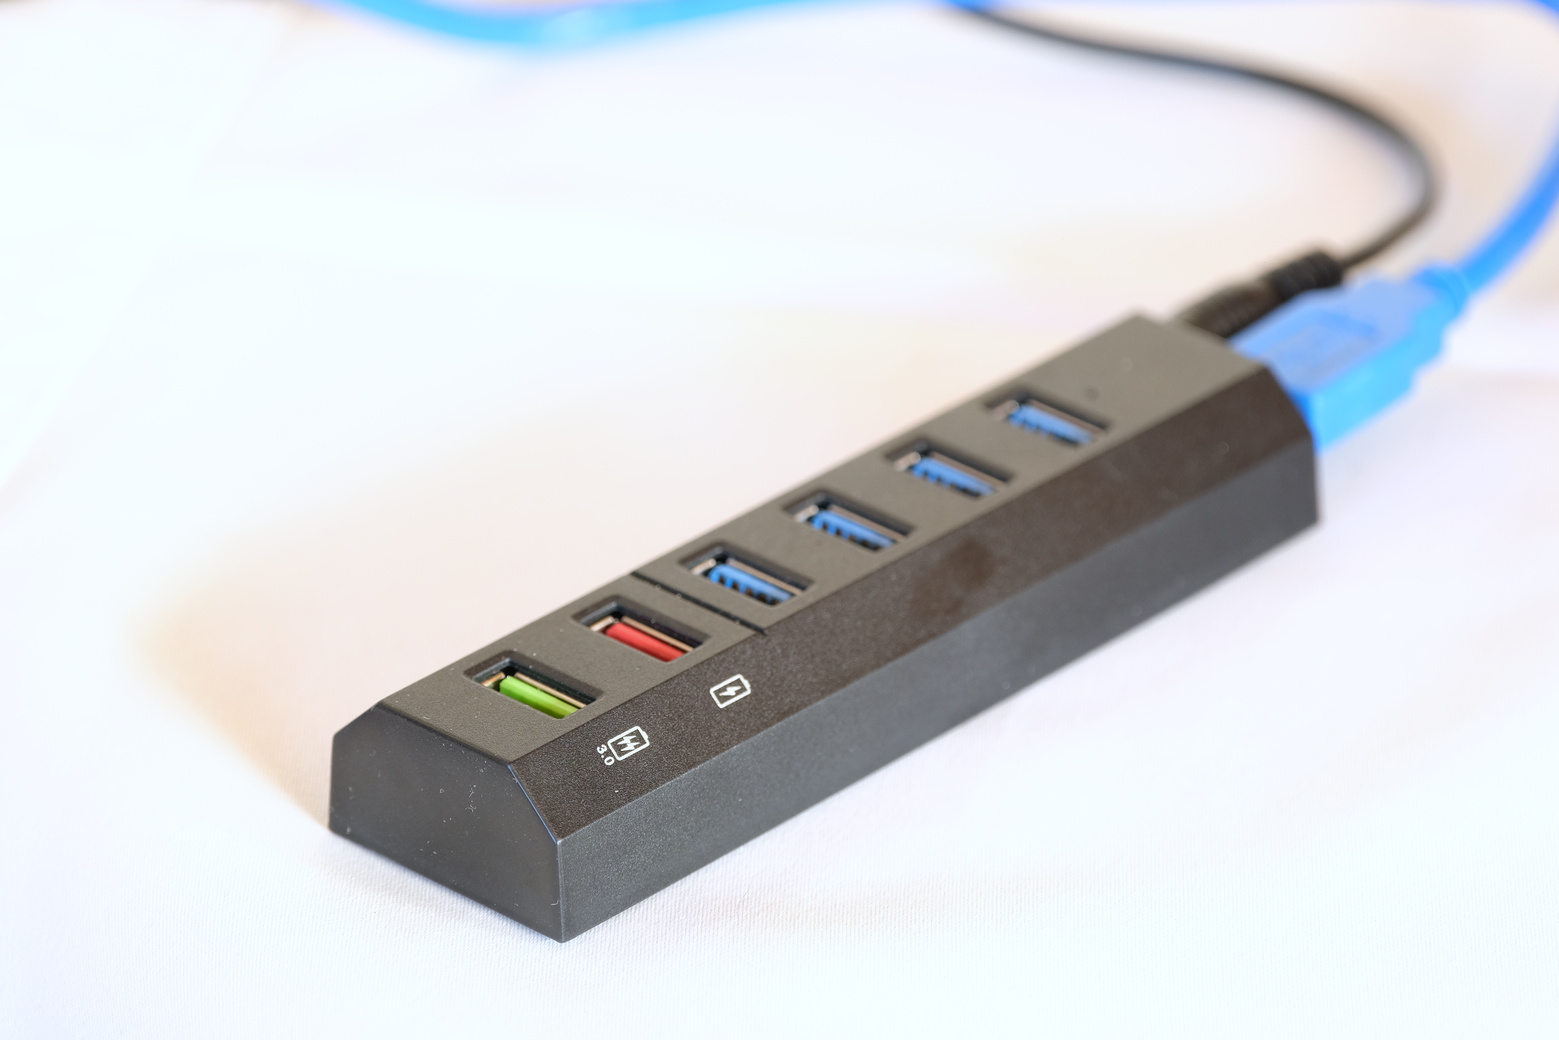
I’m sure you’ve noticed that we have two USB 3 ports available on the Raspberry Pi 4b/5 but we want to connect four drives (and maybe more in the future). So we’ll have to use a USB hub to connect all drives. The first important point is to make sure that we use a USB 3 hub (a USB 2 hub will work but it will be very slow).
My setup contains a 4TB 3.5″ WD Elements HDD and three 2TB 2.5″ WD Elements HDDs. I’ll also test a 1TB Samsung SSD. Your setup will probably be different so you’ll have to adjust the power requirements we’ll estimate below for your situation.
In my setup the 3.5″ HDD is self-powered but the SSD and the 2.5″ HDDs are not. Each of the three 2.5″ HDDs consumes up to 3W, for a total of 9W1. The RPi can provide at most 6W (1.2A) via USB so the USB hub has to be powered. We may also want to use the SSD so we’ll include it in this calculation.
Power Requirements for the USB Hub
How much power the USB hub has to provide will depend on the exact configuration of our NAS. We’ll certainly use the three 2.5″ HDDs. Let’s assume for now that we’ll also use the SSD. The Raspberry Pi could be powered by its own power supply or it could be powered by the USB hub. Let’s assume for now that the RPi will be powered from the USB hub. Thus, an upper limit for the power necessary for our hardware is given in the following table.
| Device | Required Power (W Peak) | Required Power (W Average) |
|---|---|---|
| 3 x 2.5″ HDD | 9 | 5 |
| 1 x SSD | 2 | 2 |
| 1 x Raspberry Pi 4b | 8 | 7 |
| Sum | 19 | 14 |
Thus, any USB hub that can provide at least 19W of power will certainly be sufficient for the current hardware of our NAS.
The numbers above are rounded up to whole numbers. For a more detailed look at the power consumption of our final NAS have a look at this post.
USB Hub Comparison
I’ve tested five different USB hubs, from cheapest to most expensive:
| Name | EUR |
|---|---|
| NOVOO Ultra Slim R5 Lite2 | 10 |
| Vansuny USB Hub Aktiv 3.0 (24W) | 19 |
| Atolla USB Hub Aktiv 3.0 (20W) | 25 |
| CSL – USB Hub 3.2 Gen1 (36W) | 40 |
| Anker 60W 7-Port USB 3.0 (60W) | 65 |
The good news is that if your drive is correctly recognized as a USB 3 device, when connected via a USB hub, then all of them performed equally well in my dd tests3.
The not so good news is that not all of them reliably recognized my drives as USB 3 devices. The NOVOO, Atolla and the CSL frequently mistook them for USB 2 devices. When that happens any copying is limited to at most 480Mb/s (60MB/s). That’s the theoretical maximum. In my tests I got actual write speeds of roughly 30MB/s. Repeated unplugging and reinserting worked but that’s rather cumbersome. So those three devices had to go back.
Both the Vansuny and the Anker reliably recognized my HDDs as USB 3 devices (and they don’t vary much in terms of transfer speed). Their difference is really in the number of devices they can connect and in the power they can supply.
The Anker has seven ports and is rated for 60W. It has an additional three ports for fast USB charging. If you want to connect a lot of hard drives or use it to power other USB devices then it’s probably really good. For my specific purpose it felt like it was too much. So that too went back.
The Vansuny has four ports (+two charging ports) and runs with 12V/2A (=24W), which is sufficient for my setup. So I’ll be using the Vansunny. There’s also a version with six ports (+two charging ports) which provides 36W, for those of you who want to add more drives.
Speed Penalty
There is a little problem with using a USB hub with the Raspberry Pi 4b. To illustrate it let’s do a quick test. Let’s connect one of the HDDs directly to the RPi and run the following command.
dd if=/dev/zero of=nas_mnt/tempfile bs=1M count=4096 conv=fdatasync status=progressThe dd command was not made for speed tests and we’re not really using it for that but just to illustrate a point4. The source of the data we’re copying is /dev/zero which provides a constant stream of zeros. This is useful as a source because it can be created very quickly so it won’t limit the speed of the copy process. Put differently, the speed we can obtain will only be limited by the device we’re writing to (the HDDs) and by the connection (the USB Hub). We write 4096 blocks of 1MB each for a total of 4GiB. The option conv=fdatasnyc tells dd to only return when the data has been written to the disk. Otherwise it would return while some of the data is still in a cache of the disk, which would inflate write speeds.
Let’s do to the actual test. First we connect a 2.5″ HDD directly to the RPi and copy data to it with the previous command. When it has finished we write down how long it took. Ideally we run the command repeatedly and report the average of our observations. Then we disconnect the HDD, reconnect it via the USB hub and do the same process again. Finally, we’ll do the same again with the 3.5″ HDD. We get the following results:
| Device | Direct Connection MB/s | Via USB Hub MB/s |
|---|---|---|
| 3.5″ HDD | 159 | 103 |
| 2.5″ HDD | 103 | 96 |
What happened here? Copying via the USB Hub is slower than without it, especially for the 3.5″ HDD5.
It turns out that write bursting is disabled when a RPi 4b talks to drives behind a USB hub due to the risk of data corruption (see here for more information). Apparently this is not an issue for the Raspberry Pi 5.
Note, if you get even slower speeds, maybe of the order of 30MB/s, make sure that your HDD is recognized as a USB 3 device! As mentioned above, some hubs frequently mistake USB 3 capable HDDs as USB 2 devices. To check if it’s recognized correctly run
lsusb -tand make sure that in the line referring to your HDD (Class=Mass Storage) it says 5000M, not 480M!
So that’s it for this post. You should now have enough information to choose a USB Hub that’s suitable for your NAS! In the next post we’ll look more closely at HDDs and SSDs.
Footnotes:
- The 3W represent the peak consumption during spin-up of the disks. During normal operation consumption is lower. However, we should consider the peak consumption in our estimate because when the RPi boots it will also spin up all connected disks, so the peak consumption of all three drives happens roughly at the same time. ↩︎
- I tested this one later, after the original tests with the other four hubs. It doesn’t have a power supply included but you can add your own by connecting it to the USB-C port. Apart from not reliably recognizing devices as USB 3, when the external power is connected then the hard drives were not recognized at all. I tried with a few different power sources (Laptop PSU, Raspberry Pi PSU, USB charger, and a powerbank) but that made no difference. ↩︎
- I haven’t described those tests here because they were among the first tests I did and after restructuring and rewriting these posts I misplaced the actual numbers. There’s not much to the tests though. I’m just copying data from the Raspberry Pi to the 3.5″ HDD, which is connected via the respective USB hubs. Then I compare the speed reported by dd across the USB hubs. The speeds were roughly identical but much lower than the theoretical maximum of 5Gb/s (=625MB/s). ↩︎
- Yes, you’re right this is a speed test, but for the purpose of this illustration dd is perfectly appropriate. ↩︎
- The numbers for the 2.5″ HDD actually look quite good in this test. When I did a slightly different test earlier the 2.5″ HDD experienced a much larger drop. ↩︎
Leave a Reply