In the video in the previous post we installed Greyhole on our Raspberry Pi. We also set up a simple Samba share. In this post we’re going to mount Samba shares on a few different operating systems.
This post is part of a series about building a Network-Attached Storage (NAS) with redundancy using a Raspberry Pi (RPi). See here for a list of all posts in this series.
Mounting Samba shares is not difficult and there are lots of resources available online. So this post is mostly for completeness1 and so you don’t have to look elsewhere if you’ve been following this series of posts.
I’m assuming that you’re interested in mounting the shares on your main OS. So if you’re a Windows user then you’ll probably skip the Linux and macOS sections2. Thus each of the three section below (Linux, macOS and Windows) is written independently of the others. So if you read them all then you may find them a bit repetitive.
Linux
Let’s start with Linux. We’ll first look at mounting shares via the command line, which should be quite consistent across different flavours of Linux.
Command Line
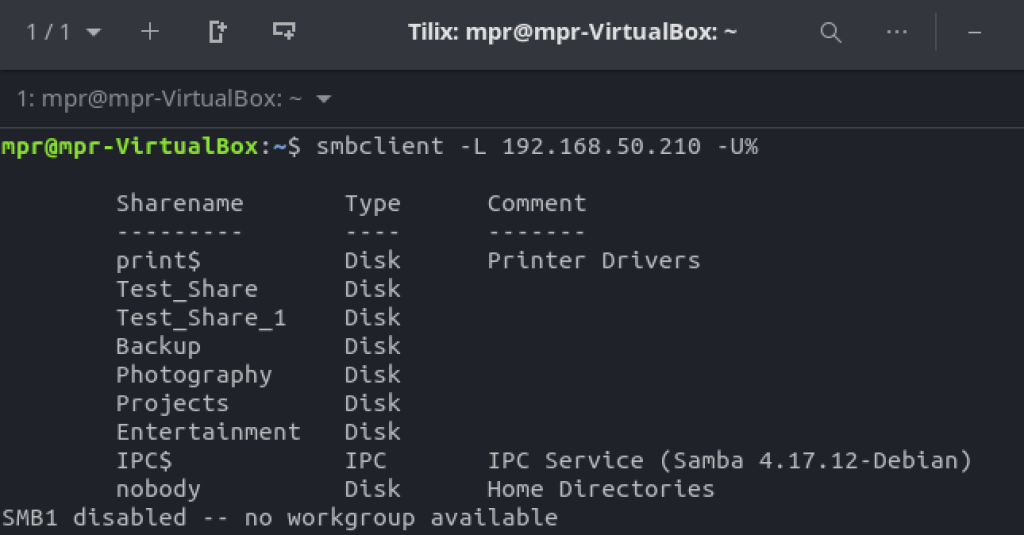
I’m going to assume that we know the IP-address of the Raspberry Pi, but we may have forgotten the exact names of the Samba shares (that happens to me sometimes). To find out which shares are available on a server we can use smbclient. You may have to install it first3, then run command
smbclient -L rpi-ip-address -U%This should give an output similar to the picture below.
To mount a share we first have to create a mount point, for example mkdir /home/mpr/temp_mount. To mount shares we use cifs. You may have to install cifs-utils first4. For example, let’s mount share Photography to temp_mount:
sudo mount -t cifs //192.168.50.210/Photography /home/mpr/temp_mount -o uid=mpr,user=mprOption user (or username) is the name of your Samba user on the Raspberry Pi. Option uid refers to the user that owns the files in the mounted Samba shares5. Upon running the command we’ll be asked for the password of our Samba user on the Raspberry Pi. We could also enter the password directly in the command above with option password.
If we want to automatically mount the Samba shares when our system boots then we have to edit fstab. So let’s open fstab with sudo vim /etc/fstab and add the following line for each Samba share
//rpi-ip-address/ShareName /path/to/mount/point cifs credentials=/path/to/credentials/file,uid=username,gid=username 0 0For example, it could look like this:

The credentials file is a file that contains our username and password so we don’t have to put them into fstab directly. For example
username=mpr
password=123
Since we don’t want everybody to be able to read our username and password we should set strict permissions on that file, for example:
chmod 600 /home/mpr/rpi-nas/.smbcredentialsYou can also change the ownership of .smbcredentials to root with sudo chown root:root /home/mpr/rpi-nas/.smbcredentials. That may add some extra security.
As always when editing fstab, reload the daemon and check if everything is ok:
sudo systemctl daemon-reload
sudo findmnt --verify
The shares will now be auto-mounted on boot (if they are available). You can also run sudo mount -a to manually mount all filesystems specified in fstab.
You may lose the connection to the Samba shares temporarily, for example when you disconnect from the network. Once you reconnect the connection will be restored and you’ll have access to the Samba shares again6.
Graphical Option
Some Desktop Environments provide graphical options for connecting to Samba shares. As an example we’ll look at Gnome on Ubuntu. Open Files (Nautilus) and click on Network.
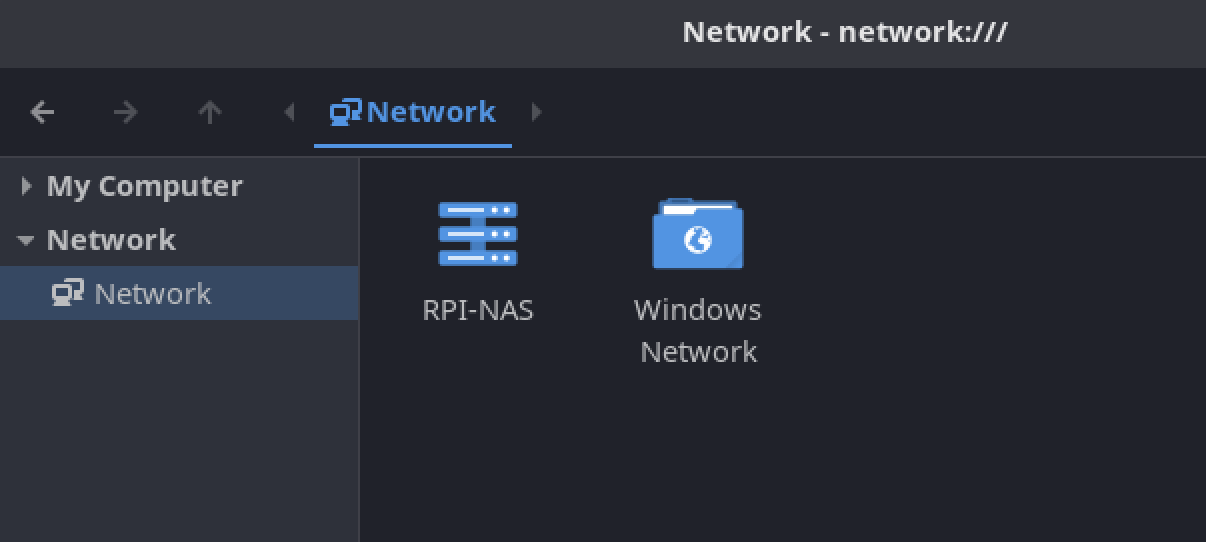
Our NAS is right there as RPI-NAS. Double-click it and you’ll see the available shares.
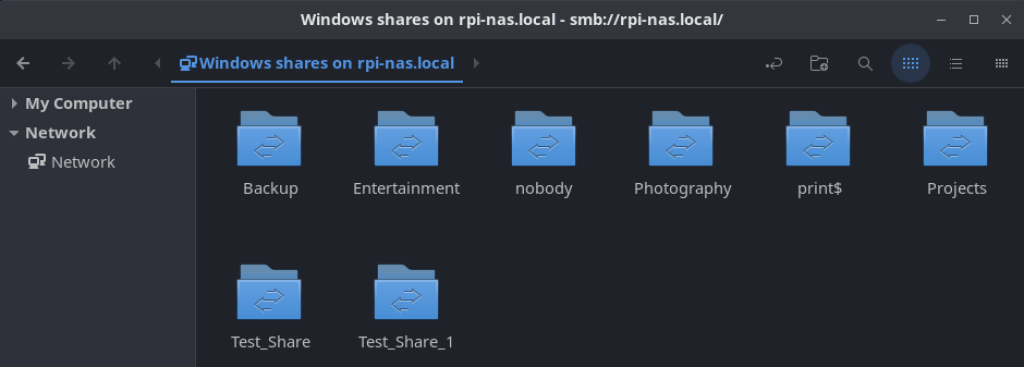
Double-click a share to access it. You’ll be asked to log in with the credentials of your Samba user on the Raspberry Pi.
Note, you will only be able to access a share if the permissions set on the Raspberry Pi permit it (we’ll look at that in more detail in the next post).
Finally, what we’ve done in this section is not identical to the previous section. On the command line we mounted a share to a directory of our choosing. In this section the share gets mounted to the place determined by Desktop Environment. For most (all?) uses that I’ve got in mind for my NAS that’s perfectly fine7.
macOS
Let’s have a look at macOS. First things first, I only have access to a 2013 MacBook Air which runs High Sierra. From what I’ve found online the commands below should still work on newer versions of macOS but I haven’t been able to test that.
You don’t need to install any additional software to mount Samba shares on macOS. Let’s start with mounting shares from the command line.
Command Line
I’m going to assume that we know the IP-address of the Raspberry Pi, but we may have forgotten the exact names of the Samba shares (that happens to me sometimes). First let’s open the Terminal. To find out which shares are available on a server we can use smbutil.
smbutil view -g //rpi-ip-addressThis should give an output similar to the picture below.

To mount a share we first have to create a mount point, for example mkdir /Users/mpr/Photography. To mount a share we run
mount -t smbfs //mpr@rpi-ip-addressInstead of mpr use the name of your Samba user on the Raspberry Pi. Upon running the command we’ll be asked for the password of our Samba user on the Raspberry Pi. We could also enter the password directly in the command by replacing //username@rpi-ip-address with //username:password@rpi-ip-address .
To automatically mount Samba shares on boot we can use launchd 8. We’re going to place the following script in /Users/mpr/Library/LaunchAgents. You can give it any name you like, for example rpi_nas_photography.plist (the ending has to be .plist).
<?xml version="1.0" encoding="UTF-8"?>
<!DOCTYPE plist PUBLIC "-//Apple//DTD PLIST 1.0//EN" "http://www.apple.com/DTDs/PropertyList-1.0.dtd">
<plist version="1.0">
    <dict>
        <key>Label</key>
        <string>nas_mounts</string>
        <key>ProgramArguments</key>
        <array>
            <string>/sbin/mount</string>
            <string>-t</string>
            <string>smbfs</string>
            <string>//username:password@192.168.50.210/Photography</string>
            <string>/Users/mpr/Documents/Photography</string>
        </array>
        <key>RunAtLoad</key>
        <true/>
    </dict>
</plist>
Replace username and password with the username and password of you Samba user on the Raspberry Pi (and replace the IP-address and paths with those appropriate for your system).
I don’t know of the best way of auto-mounting Samba shares on boot without adding your password directly into the script above. I’ve seen one description here but that uses quite a different approach9 (and it feels quite long). If you know of a way that integrates nicely with the code above then let me know and I’ll update this page.
Graphical Option
If you don’t need to mount the Samba shares to a particular folder then you can just use the graphical user interface. Open Finder. Under Shared you will see the name of your NAS, here it’s RPI-NAS. Click it to see the available shares.

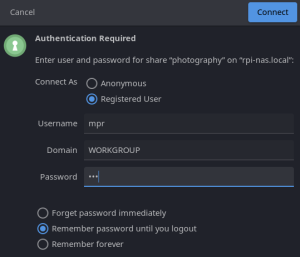
On the top right of the window click on Connect As… and enter the username and password of your Samba user on the Raspberry Pi.

You can save the password to keychain if you like10. Note, you will only be able to access a share if the permissions set on the Raspberry Pi permit it (we’ll look at that in more detail in the next post).
Finally, what we’ve done in this section is not identical to the previous section. On the command line we mounted a share to a directory of our choosing. In this section the share gets mounted to the place shown in Finder. For most (all?) uses that I’ve got in mind for my NAS that’s perfectly fine7.
Windows
Samba was originally created for Windows so it’s supported out-of-the-box. Since you’re a Windows user I’m assuming that you’re not so interested in using the command line so we’ll focus on the graphical method. It’s very easy to connect to the Samba shares on the Raspberry Pi. Below we’ll do it on Windows 1012.
Open the File Explorer (e.g. by pressing the Windows key, typing Explorer and pressing enter). In the address bar type \\rpi-ip-address (note the double backslash). In my network the RPi has address 192.168.50.210 so it looks like:
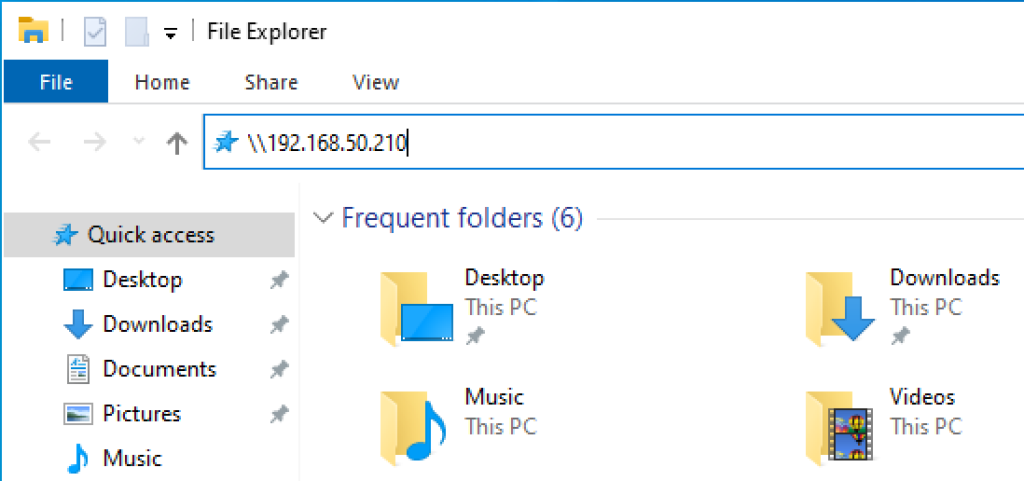
If the username and password of your Samba user on the RPi are identical to those of your Windows account then you’ll immediately see the available shares. Otherwise you’ll be asked to identify yourself.
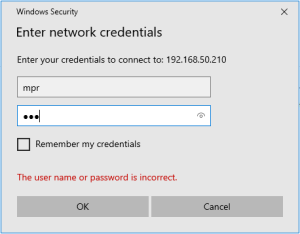
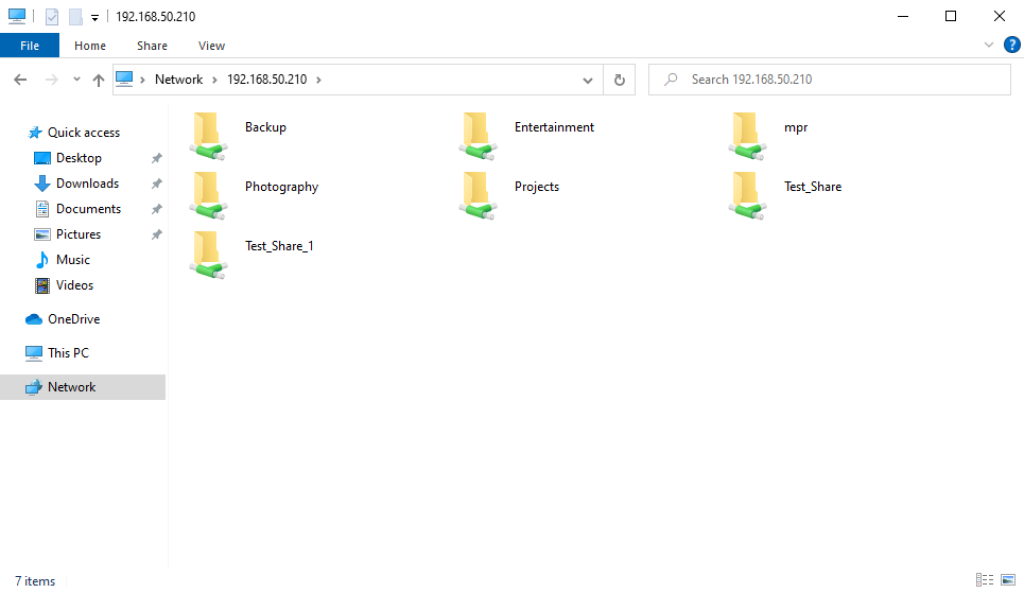
Enter your username and password. If you want Windows to automatically connect to Samba shares after booting up (or if you don’t want to enter your details after every boot), then you’ll have to select Remember my credentials. Press OK. Now you should see the Samba shares on the RPi.
You can open a share and access data on it like you would on any local folder13. If you want your system to automatically connect to a share then
- right-click the share,
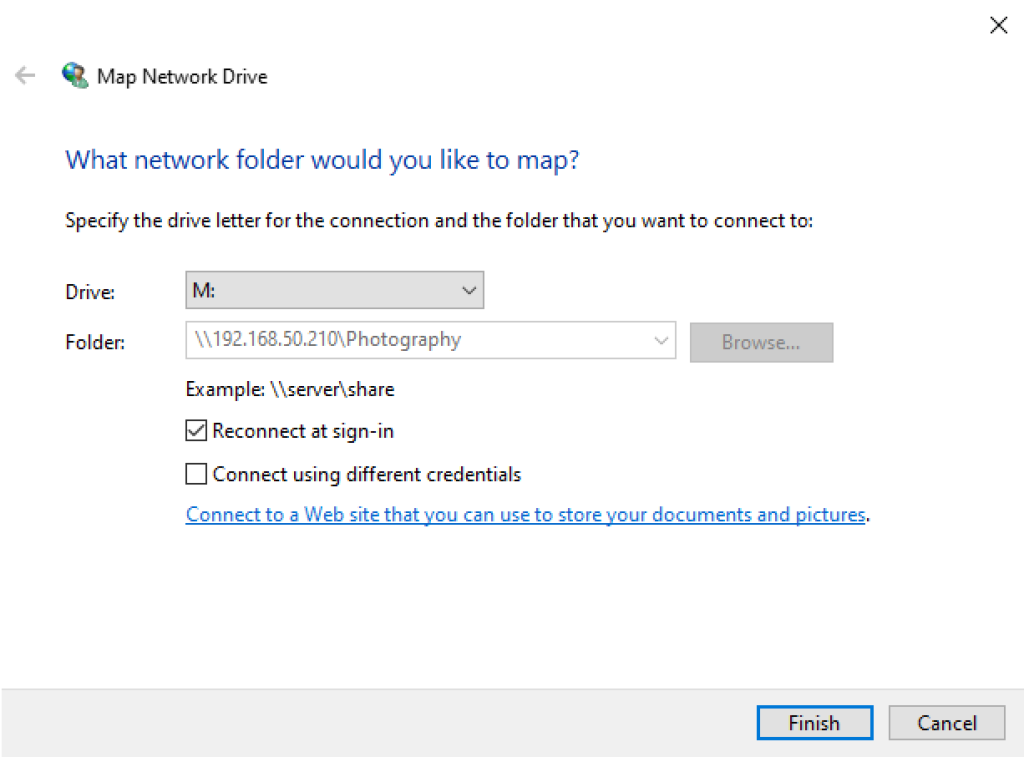
- click Map network drive,
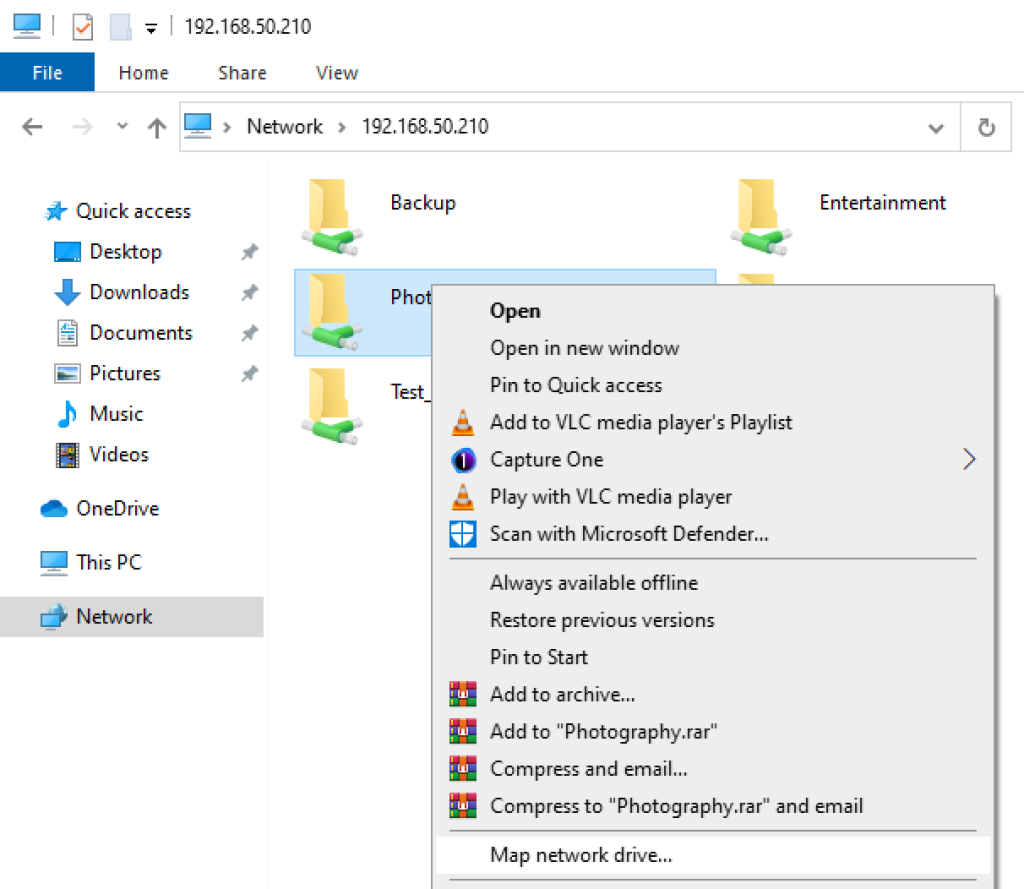
- pick your Drive (I’ve chosen M:),
- select Reconnect at sign-in, and
- press Finish.
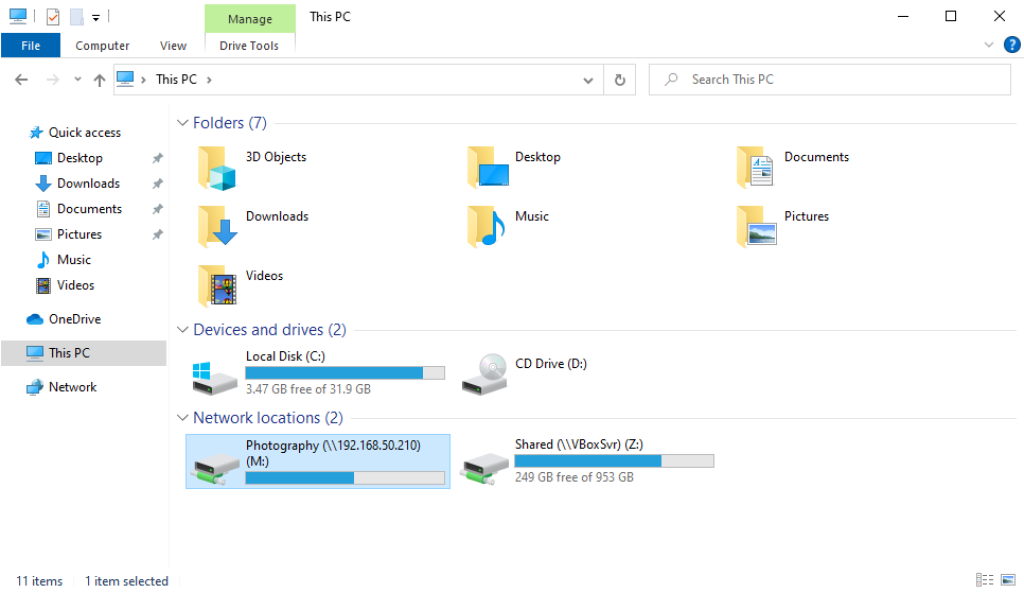
That’s it. You should now see the Samba share mapped under Network locations under This PC.
You may lose the connection to the Samba shares temporarily, for example when you disconnect from the network. Once you reconnect the connection will be restored and you’ll have access to the Samba shares again.
Footnotes:
- After having gone through the hardware and software setup in quite some detail I can’t skip the mounting of Samba shares … ↩︎
- Sure some of you will use multiple systems but I can’t assume that to be true in general. ↩︎
- For example
sudo pacman -S smbclienton Pacman-based distributions orsudo apt install smbclienton Debian/Ubuntu/etc. ↩︎ - For example sudo pacman -S cifs-utils on Pacman-based distributions or
sudo apt install cifs-utilson Debian/Ubuntu/etc. ↩︎ - According to
man mount.cifsuid “sets the uid that will own all files or directories on the mounted filesystem when the server does not provide ownership information”. Without Unix Extensions (which are only available for the deprecated Samba version 1 protocol and have to be turned off for Greyhole anyway) the server doesn’t provide ownership information. So without uid we won’t be able to change any files or directories. We’ll look at that a bit more in the next post. ↩︎ - That’s what happens on my computer which runs Arch Linux. I did not test it thoroughly on other flavours of Linux! ↩︎
- I see very little practical difference to mounting a share with fstab when you let Gnome save your credentials. It won’t auto-mount on boot but only when you try to connect to it, but that may be an advantage. If you mount a share (without intending to use it) then the drive containing the Samba shares will spin up without getting used … ↩︎
- See https://www.launchd.info for a good tutorial. ↩︎
- I haven’t tested that approach. ↩︎
- If you save your credentials to keychain then you won’t have to retype them which is convenient but a bit less secure. ↩︎
- I see very little practical difference to mounting a share with fstab when you let Gnome save your credentials. It won’t auto-mount on boot but only when you try to connect to it, but that may be an advantage. If you mount a share (without intending to use it) then the drive containing the Samba shares will spin up without getting used … ↩︎
- I’ll also assume that you have no complicated Workgroup setup. By default Greyhole assumes the workgroup to be called WORKGROUP. We won’t make any changes to that here. ↩︎
- Actually, you can only access Samba shares if you have the right permissions. We’ll look at that in more detail in the next post. ↩︎
Leave a Reply